Written by Goulin Khoge
•July 7, 2022
Bring Wikipedia page previews to the web: part 1 - implementing the frontend

Why?
Wikipedia's page previews are so useful, instead of openings tons of new tabs while researching something, you can find a summary of the topic by simply hovering over the link, in this blog post we will be trying to achieve something similar but on our own website.
How?
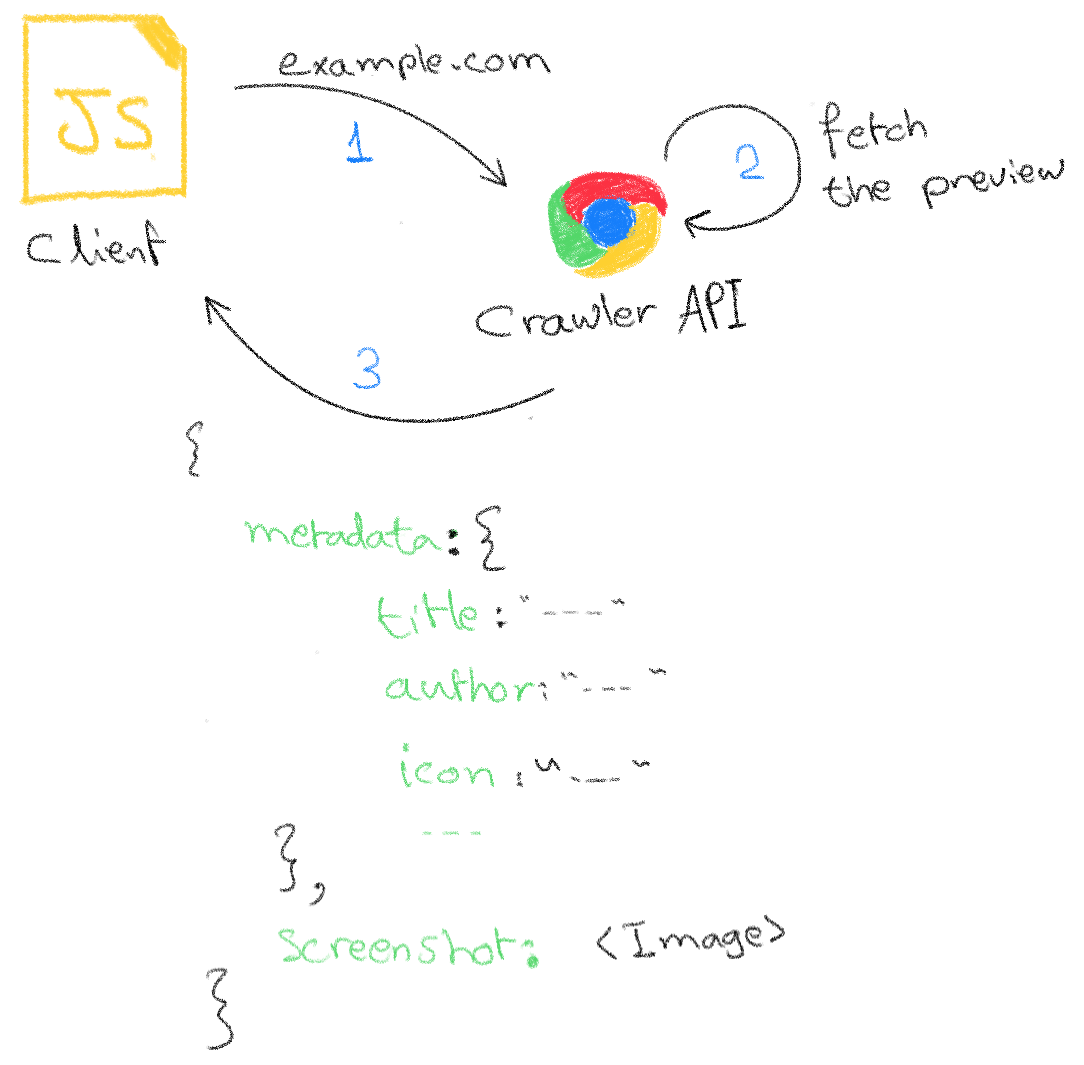
This project consists of two parts:
- The frontend: a javascript library that will be loaded in our website
- Crawler service: a REST API that will navigate to the requested website and send back some useful metadata as well as a screenshot
TL;DR Here is an amazing draw that illustrates the project idea:
Demo
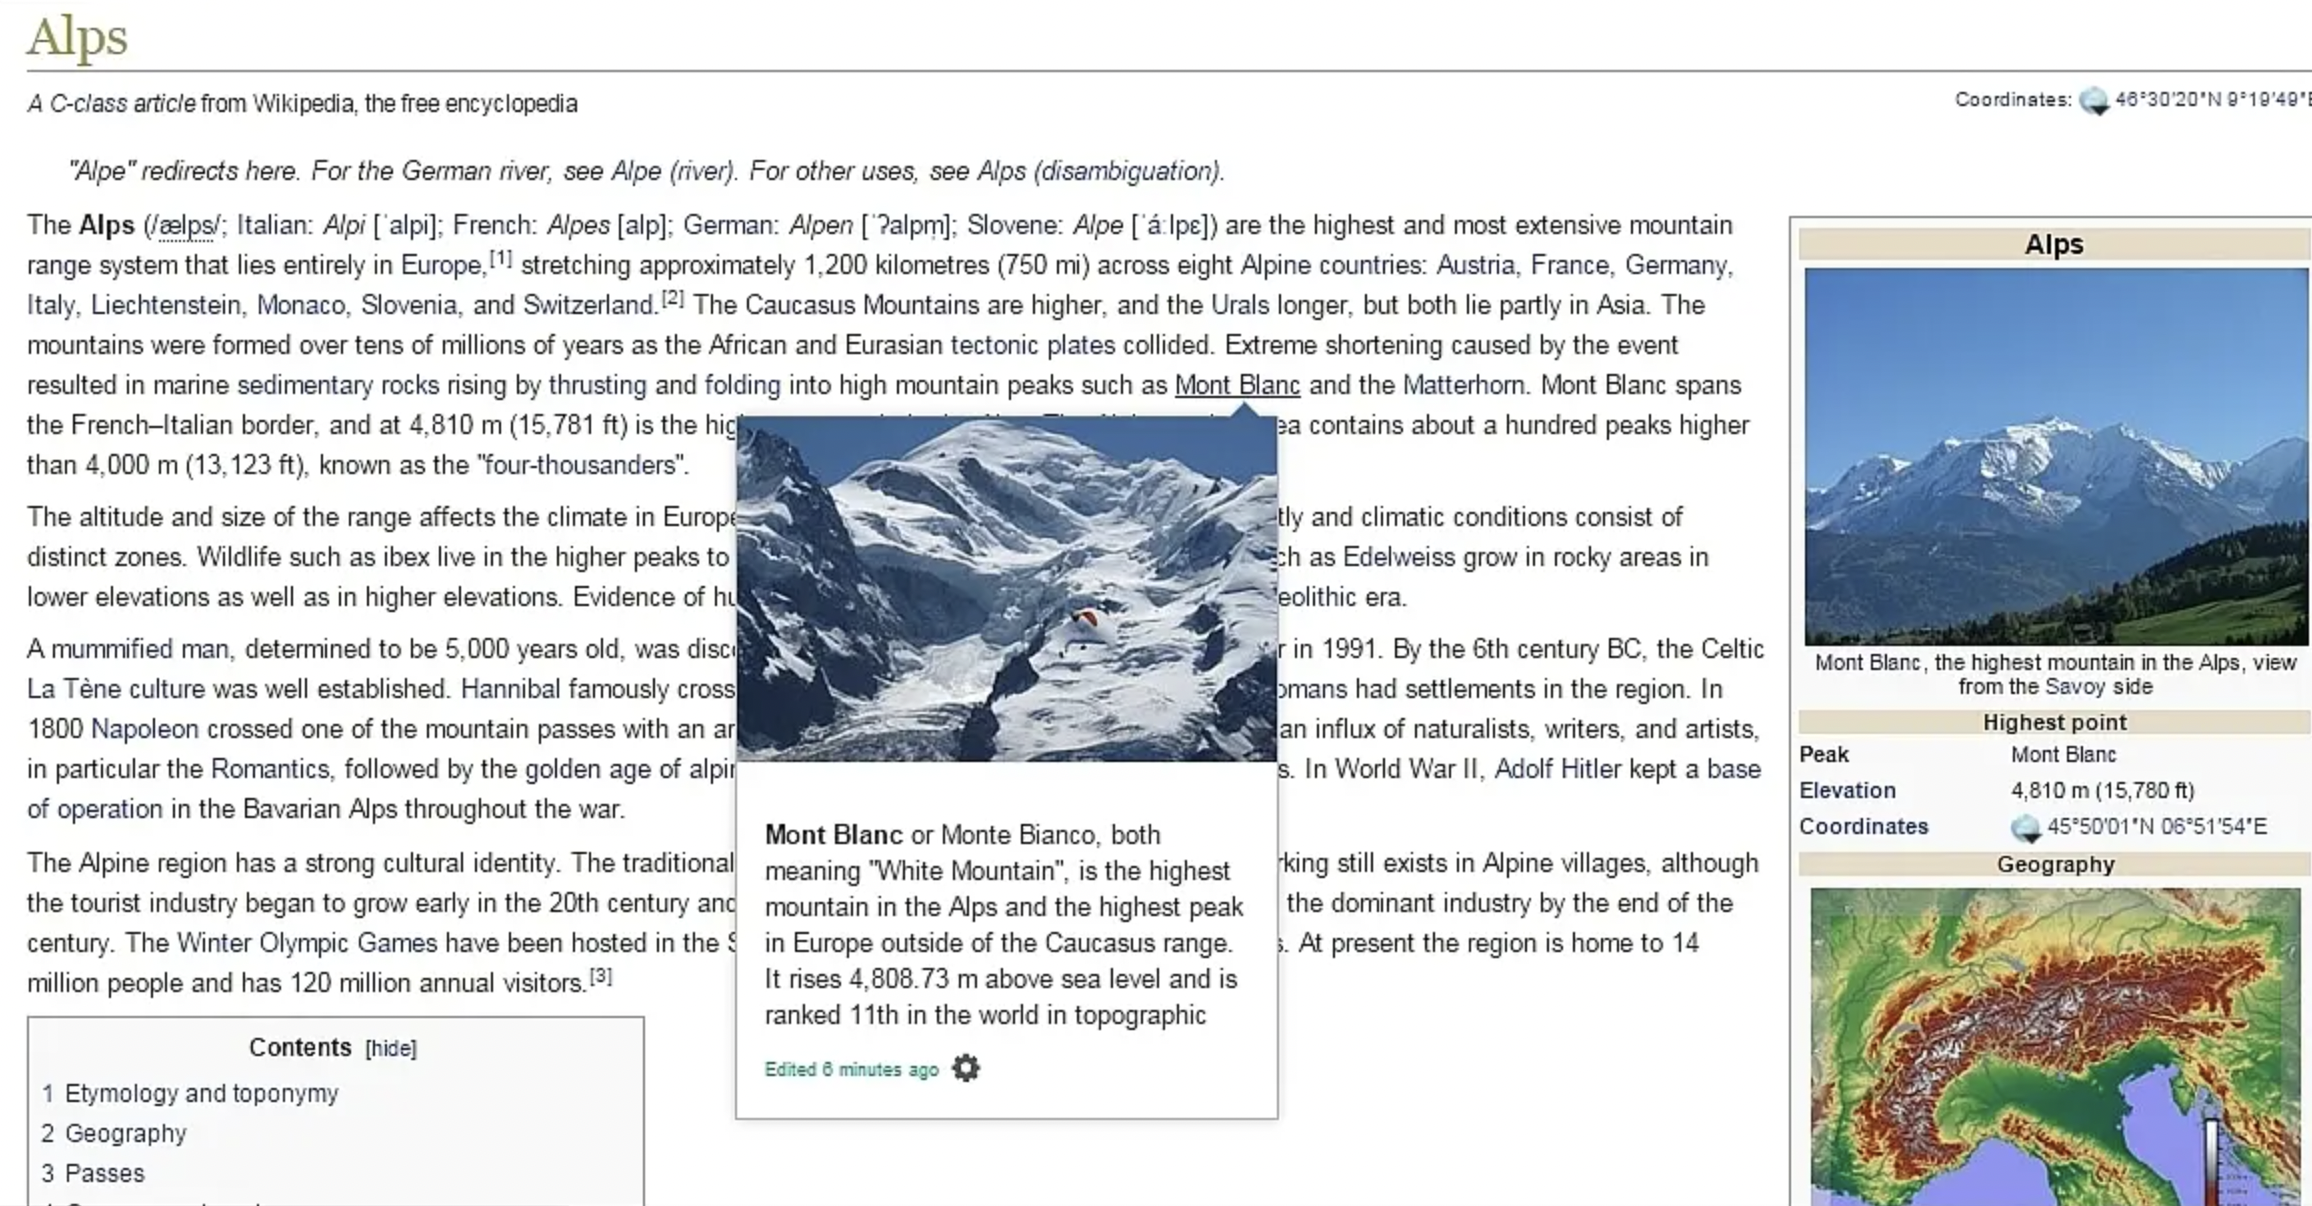
This is an example of what the final project will look like:
↓ hover over this link
Ubuntu Linux distributionEnterprise Open Source and Linux | Ubuntu
Ubuntu is the modern, open source operating system on Linux for the enterprise server, desktop, cloud, and IoT.

ubuntu.com

Implementation
The links preview SDK (frontend)
Preparing the testing data
As we don't have the backend service yet, we can mock the data that we need while working on the frontend side.
Let's take as an example the website ubuntu.com, this is what the backend will return later:
javascript
const mockData = {
screenshot:
"http://localhost:3000/assets/projects/images/ubuntu-screenshot.png",
metadata: {
title: "Enterprise Open Source and Linux | Ubuntu",
description:
"Ubuntu is the modern, open source operating system on Linux for the enterprise server, desktop, cloud, and IoT.",
icon: "https://assets.ubuntu.com/v1/49a1a858-favicon-32x32.png",
url: "https://www.ubuntu.com",
hostname: "ubuntu.com",
},
};Preparing a testing website
We also need a dummy website where we can test our frontend script, we can simply create an HTML file that look like this:
html
<!DOCTYPE >
<html lang="en">
<head>
<meta charset="UTF-8" />
<meta http-equiv="X-UA-Compatible" content="IE=edge" />
<meta name="viewport" content="width=device-width, initial-scale=1.0" />
<title>Test links preview</title>
</head>
<body>
<a href="https://www.ubuntu.com">Ubuntu Linux distribution</a>
<script src="/links-preview.js"></script>
</body>
</html>Then serve it from a basic HTTP server with something like this:
bash
npx serve .The Javascript script
Now we are ready to get into the business! we have everything we need to develop the script:
links-preview.jsThe main tasks of the frontend script are:
- Scan all the anchor tags in the website ()
<a href="..."></a> - For each scanned element:
- Get the preview from the backend service (the crawler): we will look into this step in more details later in part 2
- Setup a listener when the user hover over the element and show the preview UI element on trigger
- Setup the opposite listenner where it hides the preview popup when the user move the mouse out of the element
For the sake of simplicity we will be looking for all the anchor tag elements without advanced filtering:
javascript
function selectQueryLinks() {
return Array.from(document.querySelectorAll("a"));
}We will ask the crawler service (backend) for the data (metadata + screenshot) for each element:
javascript
const previews = new Map();
async function fetchPreview(url) {
// skip if already fetched
if (previews.get(url)) return previews.get(url);
const response = await fetch("https://localhost:3001/?url=" + url);
if (!response.ok) {
throw new Error("Received an error from the server");
}
const payload = await response.json();
previews.set(url, payload);
return payload;
}Now that we have the necessary tools let's finish the step 2:
javascript
const elements = selectQueryLinks();
// prefetch all the previews
elements.forEach((element) => {
const url = element.getAttribute("href");
fetchPreview(url);
});
// setup listeners
elements.forEach((element) => {
element.addEventListener("mouseenter", () => showPreview(element));
element.addEventListener("focus", () => showPreview(element));
element.addEventListener("mouseleave", () => hidePreview(element));
element.addEventListener("focusout", () => hidePreview(element));
});As mentioned previously, we need a basic mock data to test the script for the moment, we can set the previews manually:
javascript
elements.forEach((element) => {
const url = element.getAttribute("href");
// temporarily add this line
previews.set(url, mockData);
fetchPreview(url);
});The final step on the frontend side is the preview popup, in other words the actual preview that the user will see, to keep it simple and avoid sharing a lot of code in this blog, I've added the final frontend script code along with preview popup in this repo.
TL;DR: You can see the final result live at this demo website .
And voilà, the frontend side is done, in part 2 will look into building a REST service that does some web scrapping to get the metadata along with taking a screenshot of the requested website.